Step 1: Create a Service Plan
-
-
Log in to Plesk: Open your Plesk control panel in a web browser and log in using your administrator credentials.
-
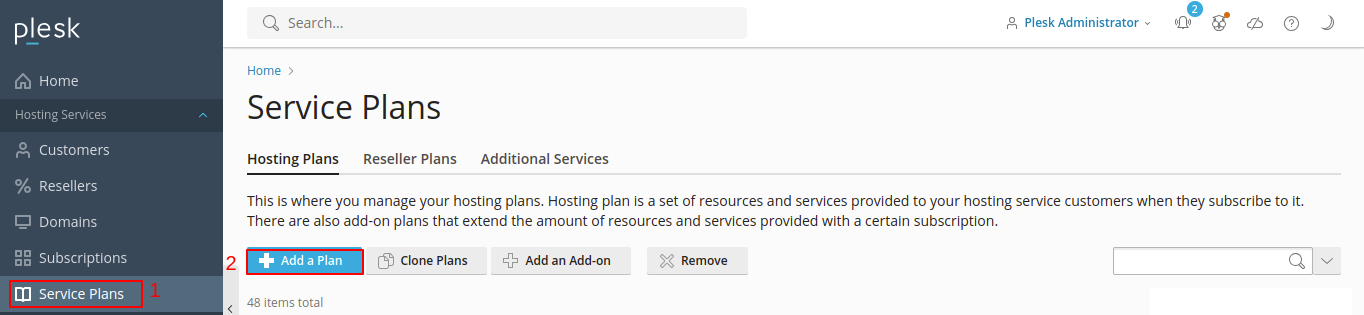
Navigate to Service Plans:
-
Go to the "Service Plans" or "Hosting Plans" section. This location may vary based on your Plesk version.
-
-
Create a New Service Plan:
-
Look for an option like "Add a Service Plan" or "Create Hosting Plan" and click on it.
-
Configure Service Plan Settings:
-
Enter a name for your service plan.
-
Set resource limits (disk space, traffic, databases, etc.).
-
Define permissions and additional settings.
-
-
Save the Service Plan:
-
After configuring the plan, save or apply the changes.
-
-
Step 2: Create a Subscription Using the Service Plan
-
-
Navigate to Subscriptions:
-
Go to the "Subscriptions" section in your Plesk panel.
-
-
Create a New Subscription:
-
Look for an option like "Add a Subscription" or "Create Subscription" and click on it.
-
Fill in Subscription Details:
-
Enter the domain name for the subscription.
-
Set the username and password for the subscription.
-
-
Select Service Plan:
-
In the subscription creation form, there should be an option to choose a service plan. Select the service plan you created in the previous steps.
-
-
Configure Subscription Settings:
-
Adjust any additional settings related to web hosting, mail hosting, DNS, etc.
-
-
Complete the Subscription Setup:
-
Review your settings and click the "OK" or "Create" button to complete the subscription creation.
-
-


By following these steps, you will have created a service plan with specific resource limits and permissions, and then used that plan to create a subscription for a particular domain.