OVERVIEW-
How to Configure Outlook automatically on Windows Server.
STEPS -
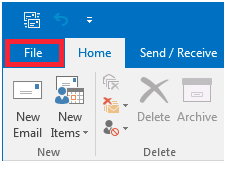
1 - Open outlook and go to ‘File’.
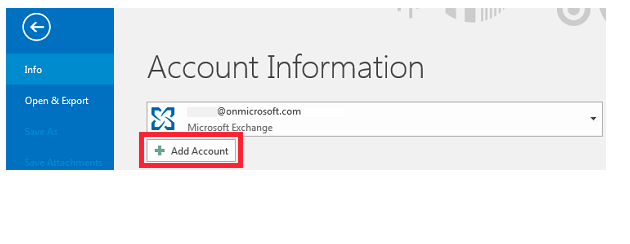
2 - Click ‘Add Account’.
3 - Select 'Email Account’ and click ‘Next’.
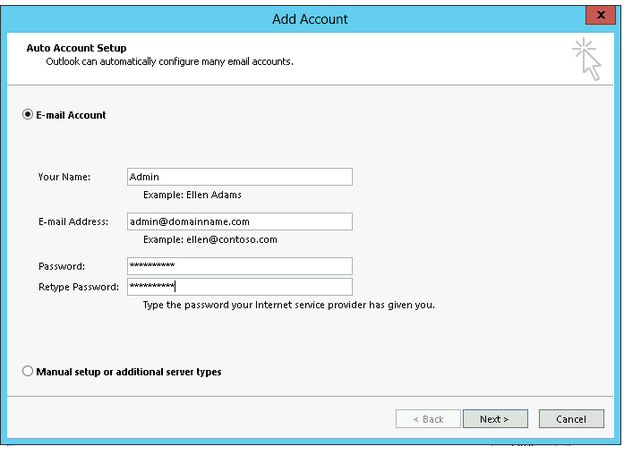
Fill Information :
- Your Name:
- Email address:
- Password:
and Retype your password.
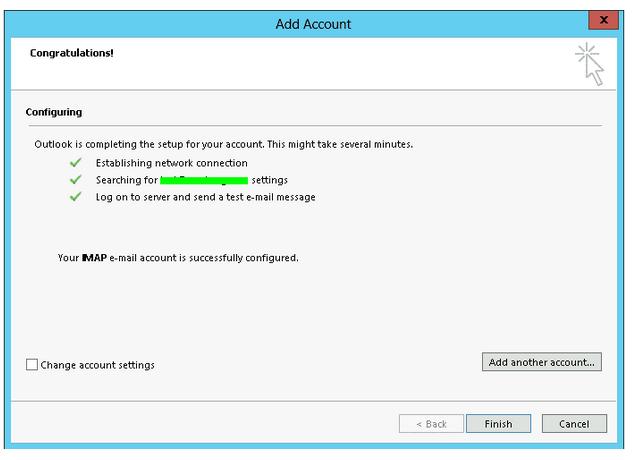
4 - Click ‘Finish’
Or For Manual settings Use below steps:-
Outlook Configuration With SSL-
Kindly configure your Outlook application according to below steps :
- File >> Add Account >> Select (Manually configure server settings or additional server types) >> Select (POP or IMAP) >>
- Fill Information.
- Your Name:
- Email address:
- Incoming Server: mail.domain_name.com OR server IP address
- Outgoing Mail Server : mail.domain_name.com OR server IP address
- User name:
- Password:
3. Click on More Settings.
>> Outgoing Server Tab
>> Checkmark "My Outgoing Server requires SMTP Authentication".
4. Click on Advanced.
4.1 For POP3 use port 995 or for IMAP use port 993.
>> Checkmark "This server requires an encrypted connection (SSL)".
4.2 Outgoing SMTP server, use port 587 or 465.
>> Use the following type of encrypted connection, select "Auto".
5. Click OK or Finish.
Outlook Configuration Without SSL-
Kindly configure your Outlook application according to below steps :
- File >> Add Account >> Select (Manually configure server settings or additional server types) >> Select (POP or IMAP) >>
- Fill Information
- Your Name:
- Email address:
- Incoming Server: mail.domain_name.com OR server IP address
- Outgoing Mail server: mail.domain_name.com OR server IP address
- User name:
- Password:
3. Click on More Settings.
>> Outgoing Server Tab
>> Checkmark "My Outgoing Server requires SMTP Authentication".
4. Click on Advanced
4.1 For POP3 use port 110 or for IMAP use port 143.
>> Checkmark "This server requires an encrypted connection (SSL)".
4.2 Outgoing SMTP server, use port 25.
>> Use the following type of encrypted connection, select "Auto".
5. Click OK or Finish.